After the engine body has been installed onto the base, the next step is to connect the CDI ignition module, Hall sensor, distributor, spark plug wires, fuel tank, water tank, and radiator.
Correct ignition positioning and wiring are very important. If the ignition sequence or sensor position is incorrect, the engine may fail to start, misfire, backfire, or run abnormally.
1. Confirm the Engine Reference Position

As shown in the picture, the two reference points on the engine must both face downward at the same time.
After setting this position, keep the engine in this position and do not rotate the crankshaft or distributor casually. This position will be used as the reference for the following ignition setup.
2. Confirm the CDI Ignition Module Direction

Check the marked point on the CDI ignition module shown in red in the picture.
This point must also face downward. Make sure the CDI ignition module is installed in the correct direction. If the module is installed in the wrong orientation, the ignition timing and firing order may be incorrect.
3. Install the Hall Sensor into the Distributor

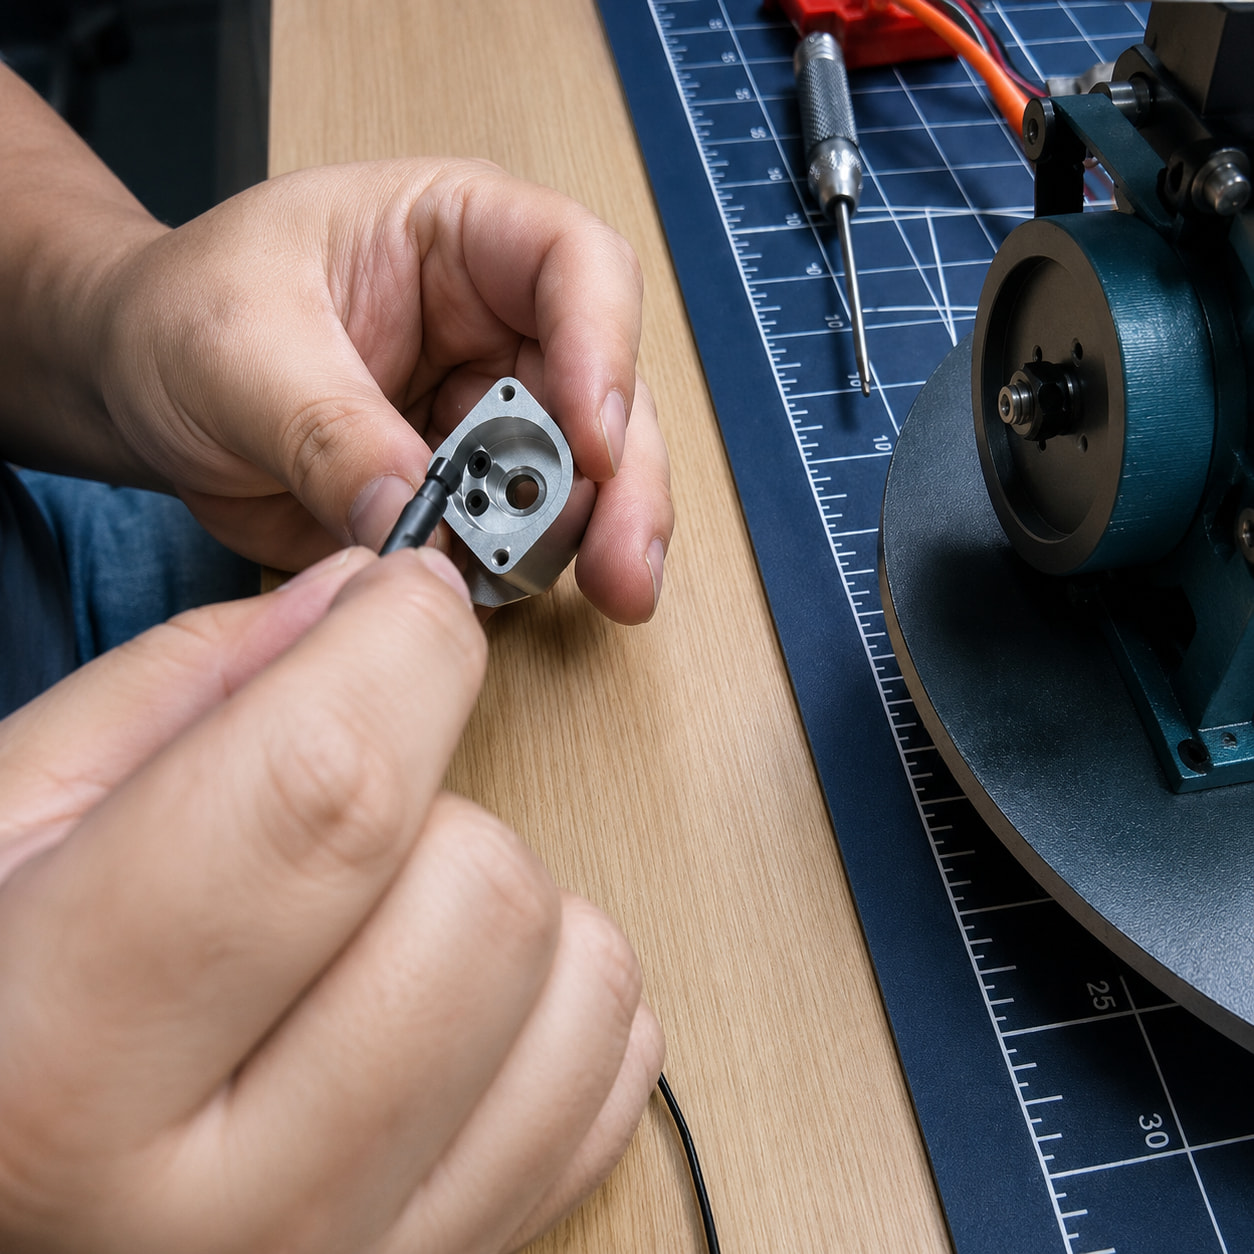
Install the Hall sensor into the distributor as shown in the picture.
Please note: the small end of the Hall sensor must face inward during installation. Make sure the sensor is seated correctly and securely inside the distributor before continuing to the next step.
4. Adjust the Distributor Angle

Rotate the distributor to the angle shown in the picture.
The distributor position is not random. It is related to the ignition timing and firing sequence of the engine. After adjusting it to the correct angle, tighten it carefully and make sure the engine reference points, CDI reference point, and Hall sensor position are all correct.
5. Connect the Ignition Wires According to the Picture

Connect the ignition wires exactly as shown in the picture.
Each output from the CDI ignition module corresponds to a specific spark plug. The spark plug wires must be connected strictly according to the required order. Do not connect them only based on wire length or convenience.
After wiring, check the following points:
-
The CDI connector is fully inserted.
-
Each spark plug wire is connected to the correct spark plug.
-
No connector is loose.
-
The high-voltage wires are kept away from hot parts and moving parts.
-
The wires are not bent sharply, pulled too tight, or pinched by other components.
6. Install the Fuel Tank, Water Tank, and Radiator
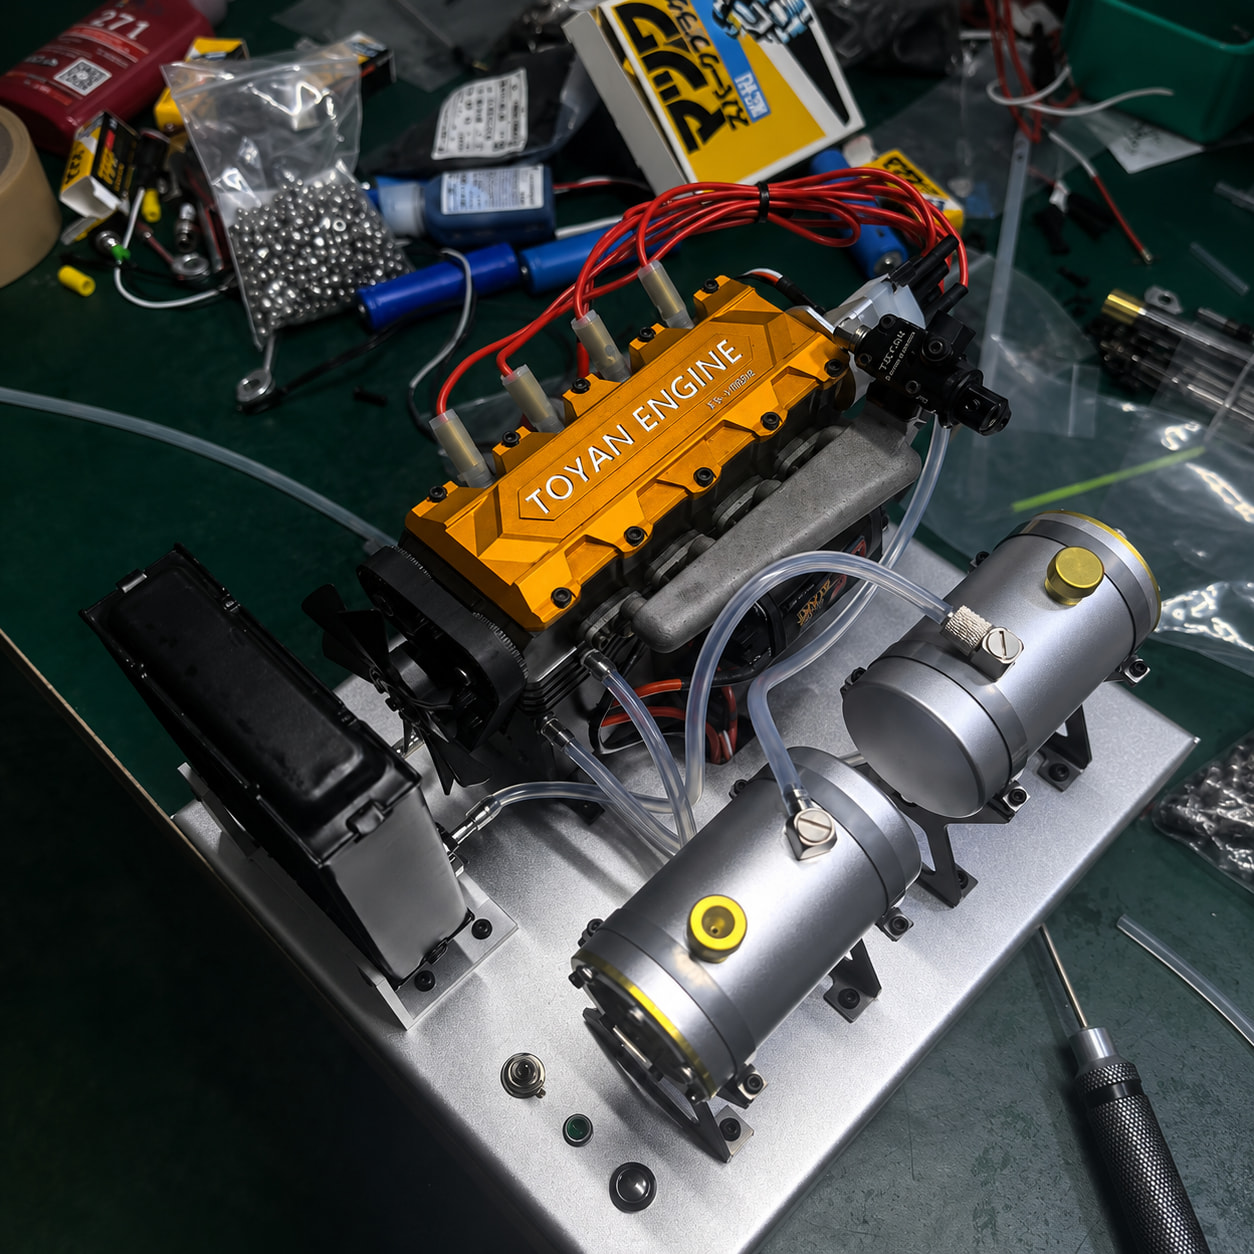

Install the fuel tank, water tank, and water-cooling radiator according to the picture.
Pay special attention to the coolant hose connections. Do not mix up the water pipes. The cooling circuit must be connected correctly to ensure smooth coolant circulation.
Also check the fuel line after installing the fuel tank. Make sure the fuel line is firmly connected and kept away from the exhaust pipe or any high-temperature area.
Final Check and First Ignition
After installation is complete, you can proceed with the ignition test.
Before starting the engine, first check whether the spark plugs are receiving ignition output. If the spark plugs produce spark normally, it means the Hall sensor has been installed correctly and the ignition circuit is connected properly.
For a new engine, you may need to keep cranking or perform several ignition attempts to help the whole engine rotate smoothly. A new engine usually needs a short running-in process. After the internal parts begin to seat and loosen up slightly, the engine will start more easily and run more smoothly.
Before the first full start, check again:
-
The engine is securely mounted on the base.
-
The two engine reference points are facing downward.
-
The CDI ignition module reference point is facing downward.
-
The Hall sensor is installed with the small end facing inward.
-
The distributor angle matches the picture.
-
The spark plug wires are connected in the correct order.
-
The fuel tank and fuel line are properly installed.
-
The water tank, radiator, and coolant hoses are correctly connected.
-
The cooling system is ready before running the engine.
-
The power supply and CDI connections are stable.
After completing all the steps above, the TOYAN FS-L400 BGC is ready for its first start-up test. For the first run, do not increase the throttle too quickly. Let the engine rotate and idle first, then observe the fuel supply, ignition condition, cooling circulation, and overall running stability before making further adjustments.